

Calendar Permissions and Sharing
This Tech Tip describes how to grant rights to view your calendar, either manually (preferred) or through email. Some departments may ask all staff members to assign Free/Busy time, subject, and location level permissions to their All Staff group.
Manually Setting Calendar Permission Levels
*This is the preferred method*
- Open your Outlook calendar
- Left-click to highlight the calendar (your primary calendar) that you'd like to change permissions for
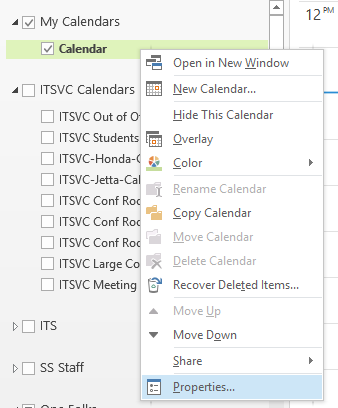
- Once highlighted, right-click the calendar name and choose Properties…
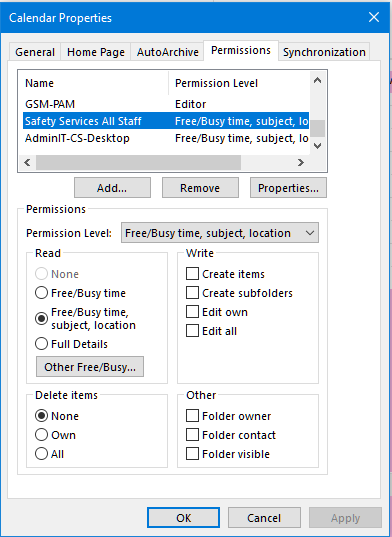
- Click on the click the Permissions tab on the Calendar Properties window that opens
- If the person you're looking for is already in this list, skip to step 7
- If the user isn't listed, create a new user by clicking Add. . .
- In the Add Users dialog box that appears, type the full name of the person you're trying to find, starting with their first name
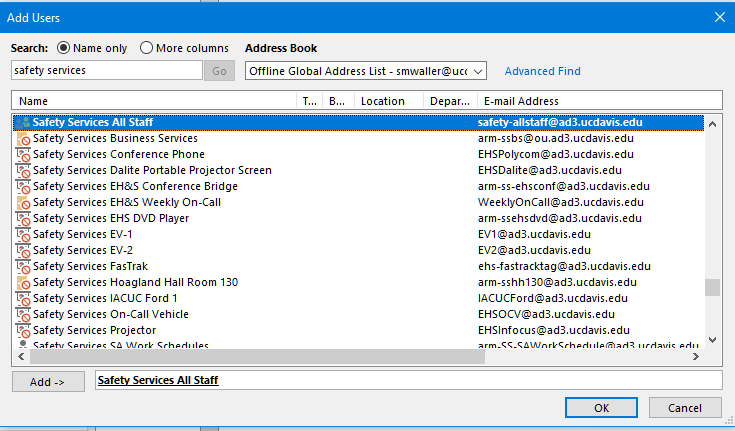
- Double-click the name of the person or group you are looking for or highlight their name and click Add -> to add them to the selection
- Click OK to close the dialog box
- The name you just added will now be displayed in the permissions list
- In the Add Users dialog box that appears, type the full name of the person you're trying to find, starting with their first name
- Highlight the person or group you want to configure permissions for
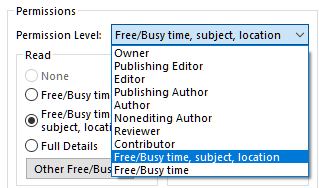
- Use the Permission Level drop down list to select a pre-configured permission set or manually change the Read, Write, Delete, and Other options to create Custom permissions.
- **Some offices set their calendar to include their "All Staff" email group with the permission level of "Free/Busy time, subject, location". This helps to assist in scheduling meetings so that people can anticipate necessary travel or return times.
- Click OK to save the settings and close the dialog box
- The person or group you've granted permissions to will now be able to access your calendar with the permission level you've specified
NOTE: If you have something personal on your calendar or don't want to share a specific item you can mark it as Private and no one else will be able to see it.
Sharing a Calendar via Invite
You can also share calendars by emailing the recipient with a calendar snapshot in the message body. This also allows you to share a specific range of days or appointments.
- Highlight the calendar that you want to share
- Underneath the Home tab, navigate to the Share group

- Click on Share Calendar
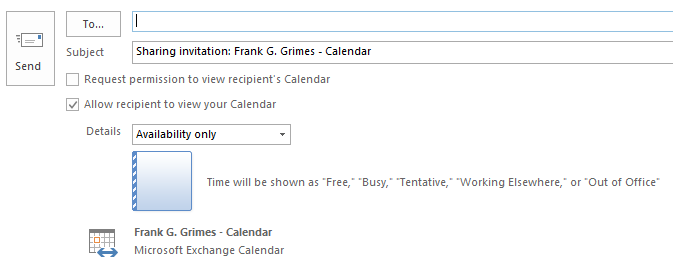
- You can also request that the recipient share his or her Exchange calendar with you by clicking the Request permission to view recipient's Calendar option
- Click OK and the recipient will see an email notification stating that you've shared your calendar
Sharing a Calendar via Email
You can also share calendars by emailing the recipient with a calendar snapshot in the message body. This also allows you to share a specific range of days or appointments.
- Underneath the Home tab, navigate to the Share group
- Click on E-Mail Calendar
- In the Calendar box, select the calendar you want to send
-
In the Data Range box, click the time period that you want to share
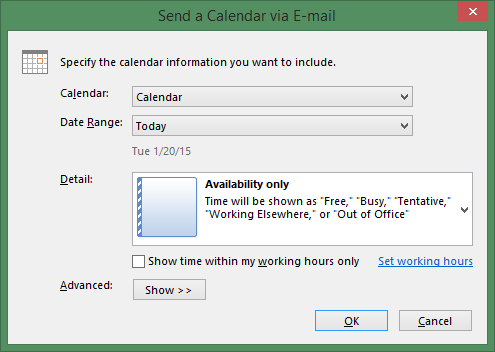
-
Click OK and the recipient will see an email notification stating that you've shared your calendar