
How to Install Software via Self Service
Overview
AdminIT utilizes the UC Davis Self-Service application allows end-users to install frequently requested software onto their computer on their own without needing administrative rights. To install one of the available software offers, please refer to the instructions below.
How to Install Software via the UC Davis Self-Service Application
- Open the UC Davis Self-Service application
- Windows
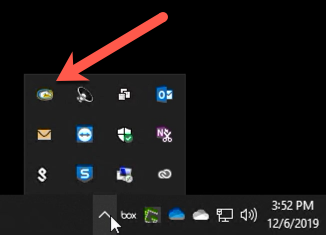
- On your computer, on the bottom right near the clock, click the UP arrow as shown below to expand your taskbar to reveal the UCD Logo icon.
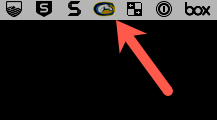
Click on the UCD Logo icon to open the UC Davis Self-Service Application
- On your computer, on the bottom right near the clock, click the UP arrow as shown below to expand your taskbar to reveal the UCD Logo icon.
- MacOS
Click on the UCD Logo icon to open the UC Davis Self-Service Application
- Windows
- Install software from the UC Davis Self-Service application
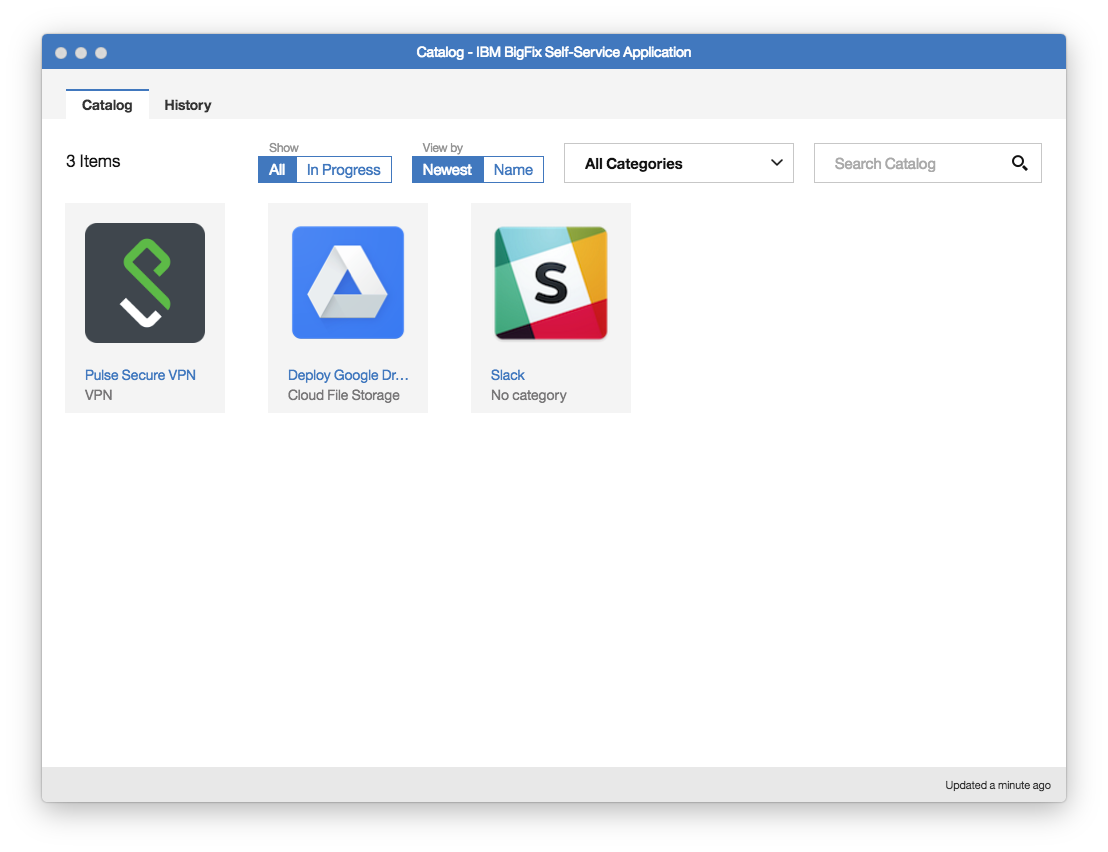
In the Catalog tab, the list of available software to install will appear. You can search or scroll the list of available software. The History tab will reveal any software previously installed via the IBM BigFix Self Service application.
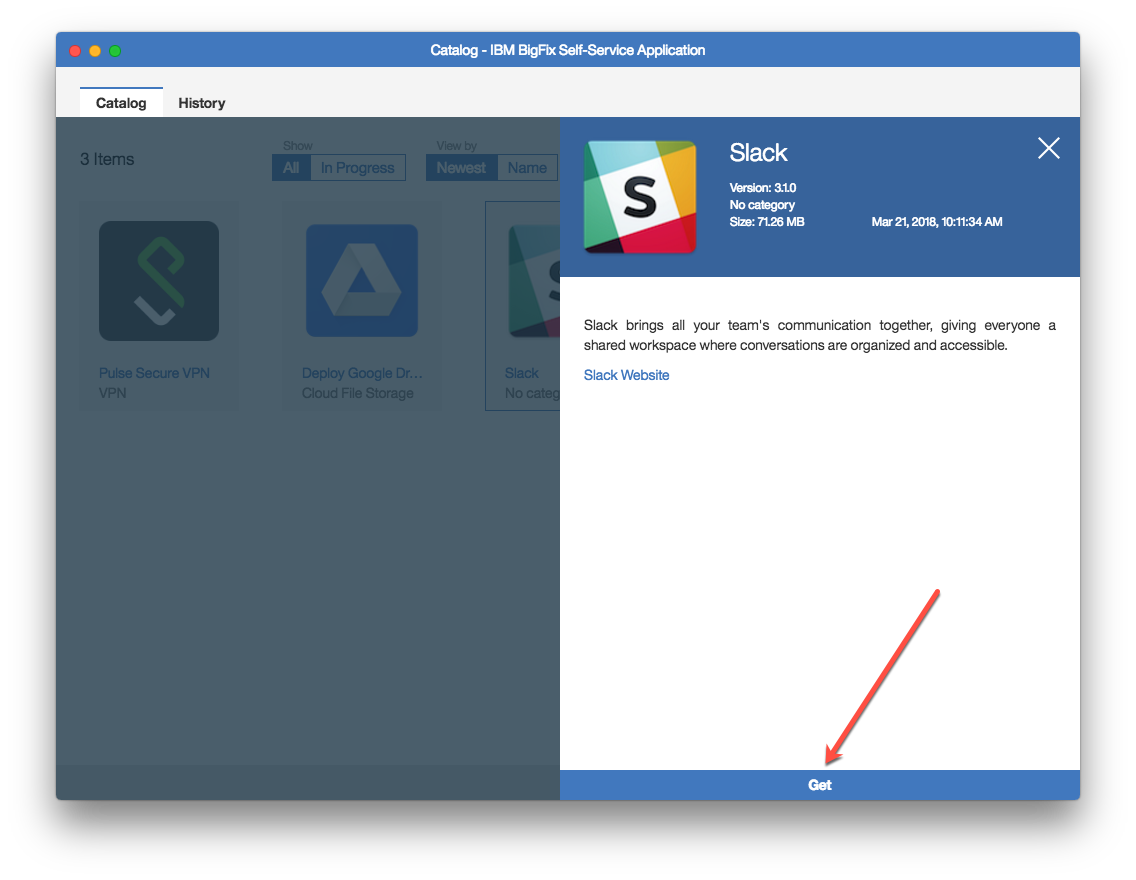
Click on any software offer and then click the Get button on any software offer to have it installed on your system.
- Once initiated, the Get button will show the current status of the software installation
The installation of the software is complete when the button turns green and shows Completed