
How to Secure Print
Overview
Some departmental Canon, Xerox, and Ricoh printer/copiers support secure printing. When secure print jobs are sent to a printer, the job is not printed on the printer immediately; the user must go to the copier and enter a PIN or Passcode to process the print job. Follow this guide to send and retrieve Secure Print jobs on a Xerox, Canon, or Rioch printer/copier.
Send a Secure Print Job
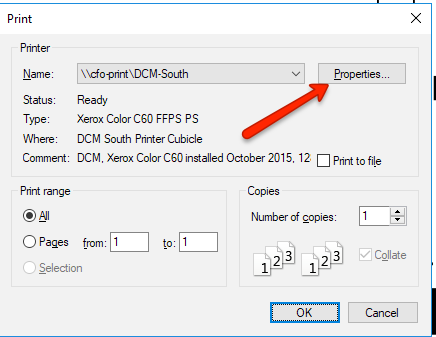
- In your Printer dialogue window, select the Xerox or Canon printer that supports Secure Printing.
Click Printer Properties or Properties, depending on where you are initiating the print job
Examples:
- For Xerox printers, perform the following:
Change the Job Type to Secure Print...

Enter in your personal Passcode. This Passcode is created by you and is used to retrieve the Secure Print job from the printer
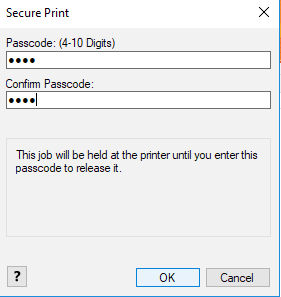
- Confirm your Passcode
- Click OK
Click OK
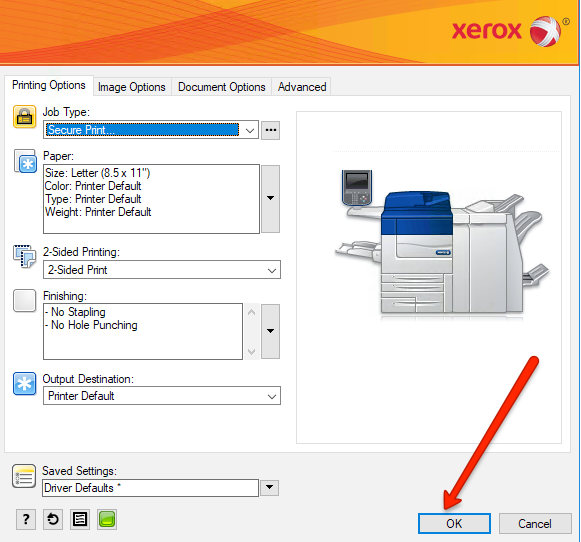
- Click OK or Print to send the Secure Print Job to the printer
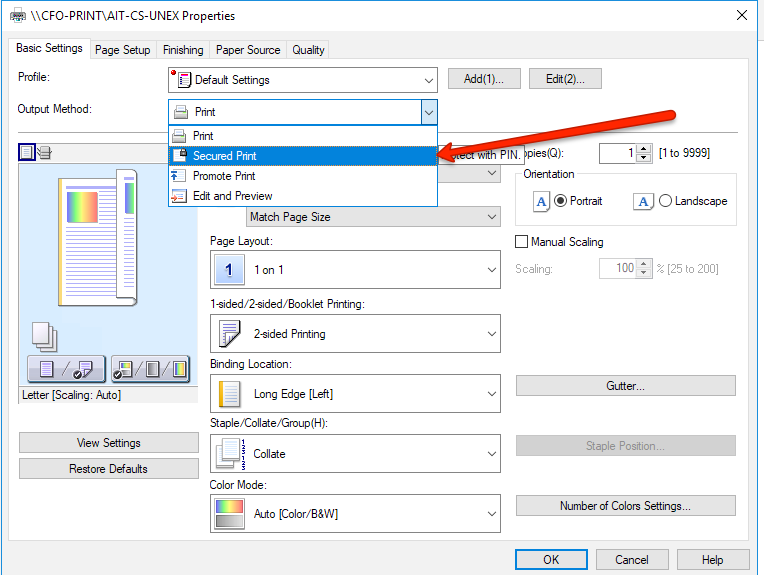
- For Canon printers, perform the following:
Change Output method to Secured Print
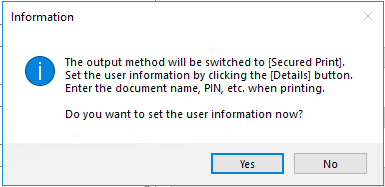
If this is the first time you have used secure printing, click Yes to enter your PIN of your choosing. If you have used secure printing before, you may click No, to use the stored PIN from last time. You may also click Yes to enter in a new pin
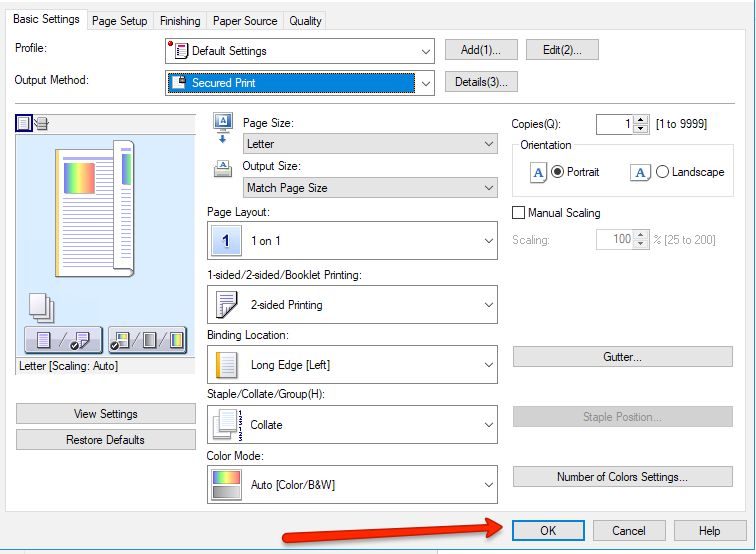
In this window, enter your personal PIN and click OK or just click OK to use your stored PIN. You can leave the User Name field as is.

Click OK
- Click OK or Print to send the Secure Print Job to the printer
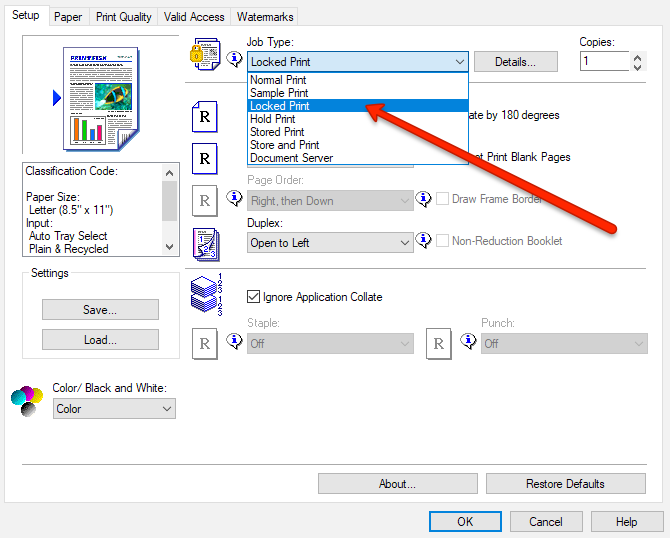
- For Ricoh printers, perform the following:
Change the Job Type to Locked Print...
Click Details

Enter in your personal User ID and Password. This User ID and Password is created by you and is used to retrieve the Secure Print job from the printer
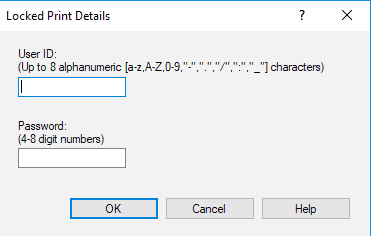
- Click OK
Click OK
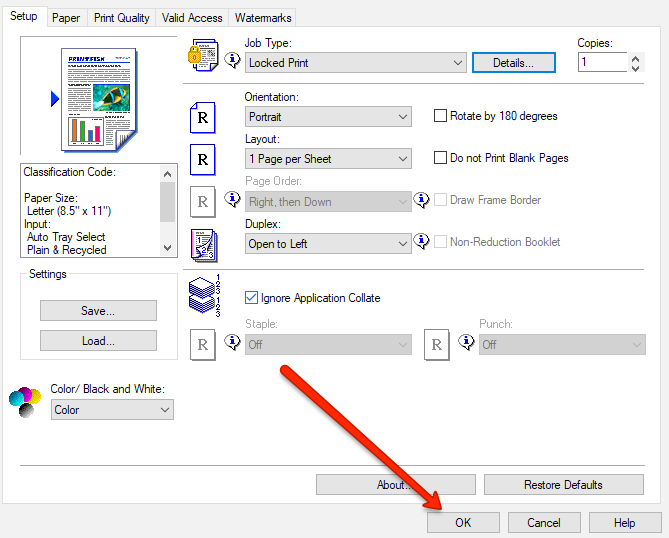
- Click OK or Print to send the Secure Print Job to the printer
Retrieve a Secure Print Job
- For Xerox printers, perform the following:
- At the physical printer console, press the Job Status button (to the left of the display panel)
- Select the Secure Print tab on the display panel
- Enter in the Passcode you created and the printing will begin.
- For Canon printers, perform the following:
At the physical printer console, press Secured Print
Select the document you want to print
Enter your personal PIN
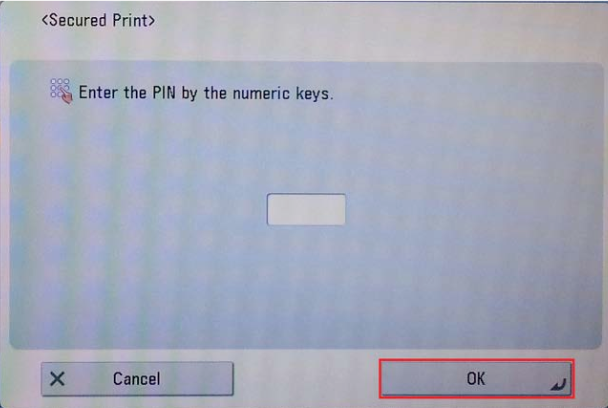
- Click OK to print your document
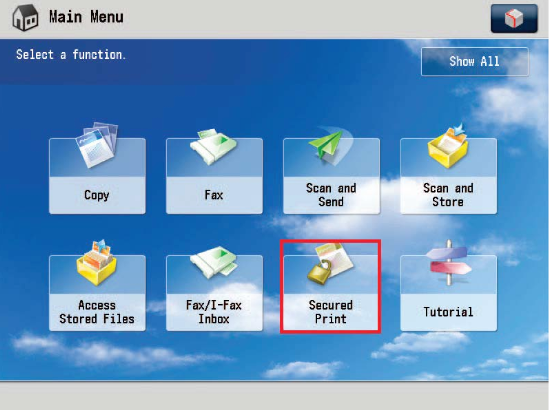
- For Ricoh printers, depending on your model, perform either method below:
- Method 1
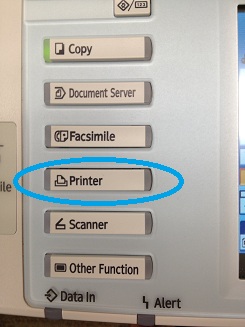
At the physical printer console, press the Printer button. This may be a physical button or a button on the control panel
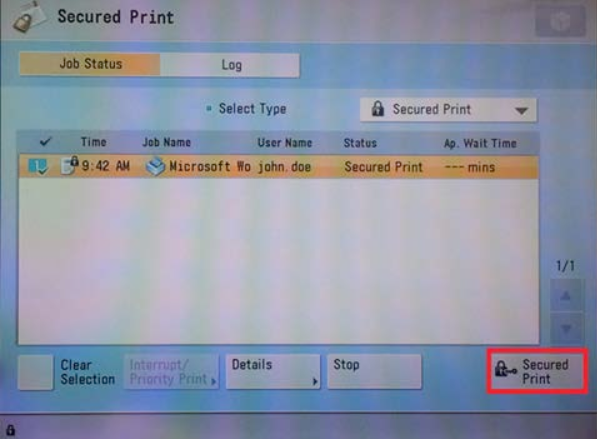
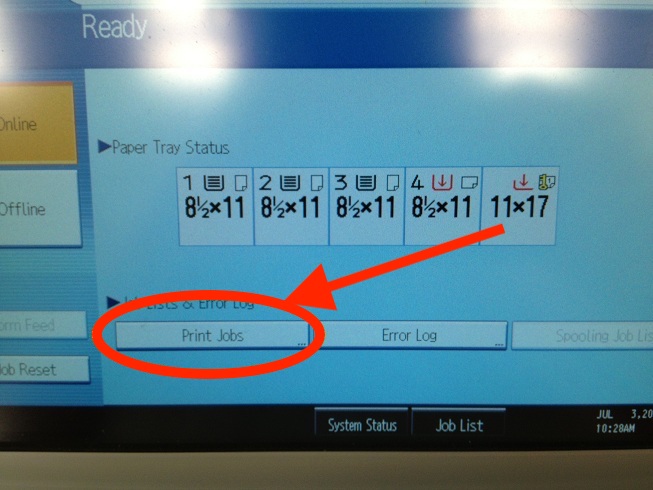
Click Print Jobs
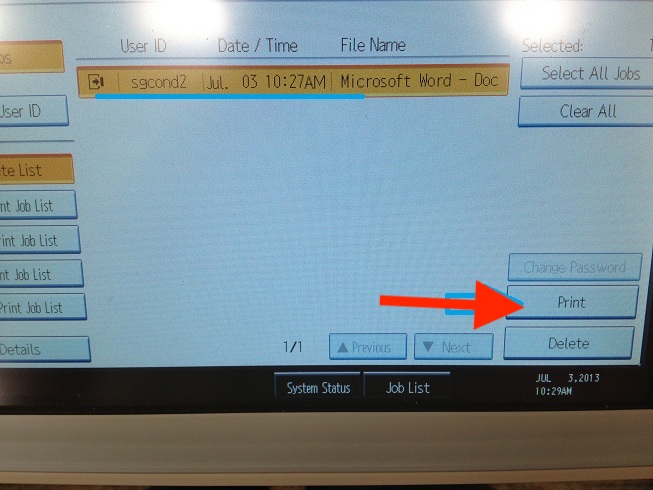
Click on your print job to select it, and then click print. Enter your password when prompted.
- Method 2
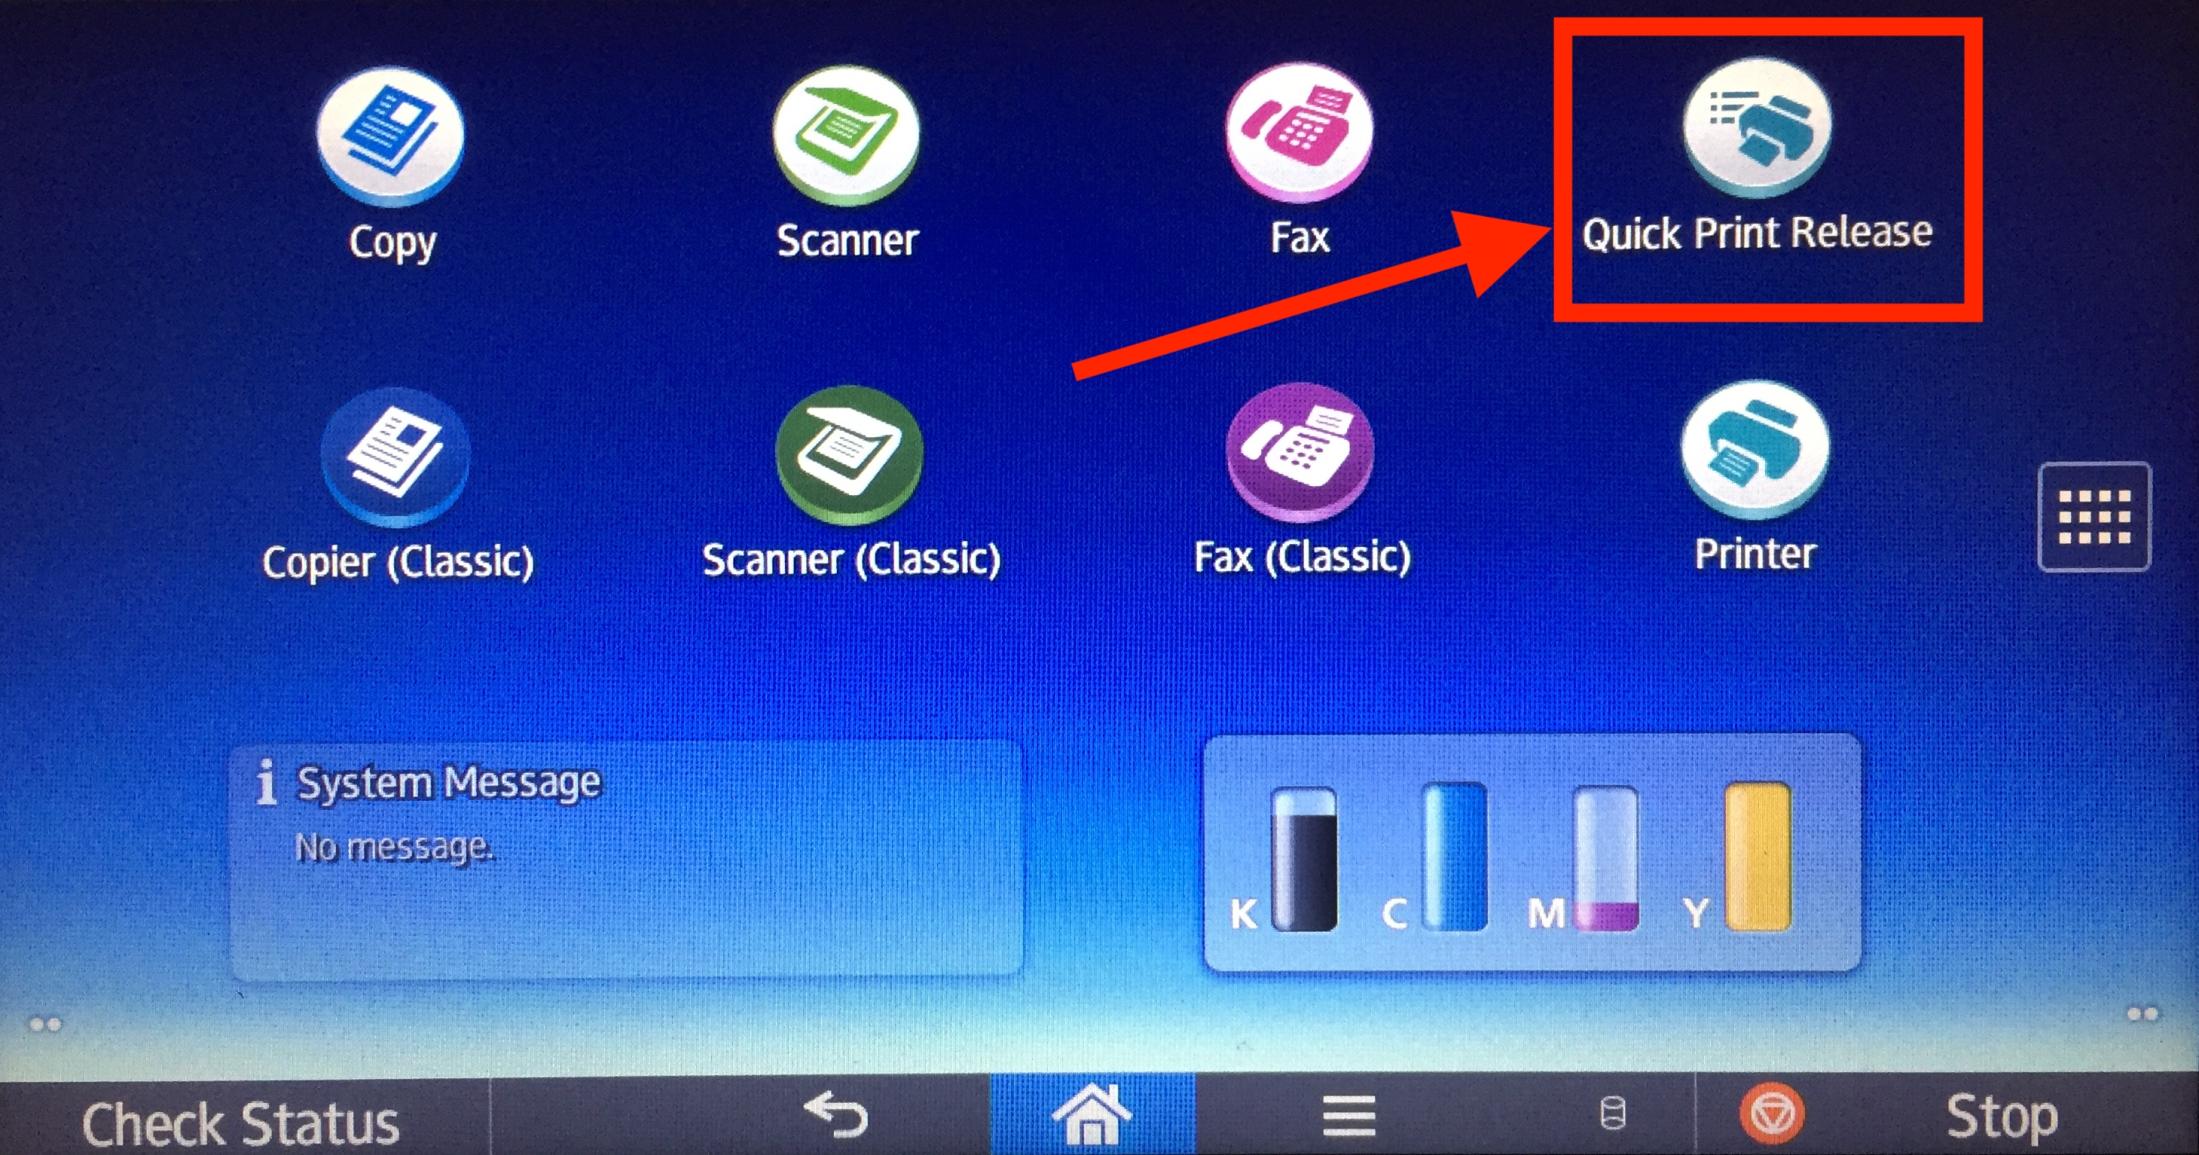
At the physical printer console, press Quick Print Release icon. You may need to press the Home icon at the bottom of the screen in the center or the icon on the right with the 12 small squares to bring up the Quick Print Release icon.
- Select the user that you specified
- Enter the password for the documents
- Select documents
More than one document can be selected at one time
You can perform the following operations on the selected documents:
Delete - Deletes the selected documents.
Preview - Shows the preview image of the first page of the document. No previews can be displayed when more than one document is selected. - Press Print
- Method 1