

How to Send an Encrypted Email with Office 365
Overview
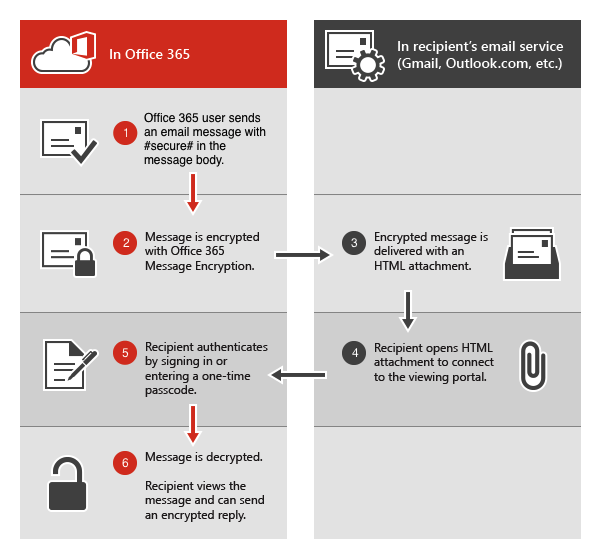
On occasion, you may need to send a secure encrypted email. Doing so will require the recipient to access a website and sign-in with their UC Davis Office 365 account or enter a one-time passcode in order to view the secure email message.
How to send an encrypted email with Office 365
Requirements
- You have to use the recipient's actual email address. Aliases, forwarding, and routing do not work because the recipient has to log-in using the email address you send it to. Since they can't log into Office 365 using the alias, they won't be able to decrypt the email.
Encrypt an email
- Type #secure# anywhere in the message body to encrypt the email and send
Upon receipt, the recipient will receive an email with an attachment and the following message in the body of the email:
"You've received an encrypted message from [email protected]
To view your message
Save and open the attachment (message.html), and follow the instructions.
Sign in using the following email address: [email protected]"
To view your message
Save and open the attachment (message.html), and follow the instructions.
Sign in using the following email address: [email protected]"
Upon viewing the secure email, the recipient will be able to send an encrypted reply