

How to Connect to the FOA VPN from Windows
Applies to: Windows only
Follow these instructions to connect to the FOA VPN from Windows.
Connecting to the FOA VPN requires specific account permissions. If not done already, please contact [email protected] for assistance.
In order to connect to the FOA VPN, the Ivanti Secure Access Client software is required. If you do not already have that software installed, you may refer to this article and select the Ivanti Secure Acces Client software offer to install it onto your computer: How to Install Software via IBM BigFix Self-Service
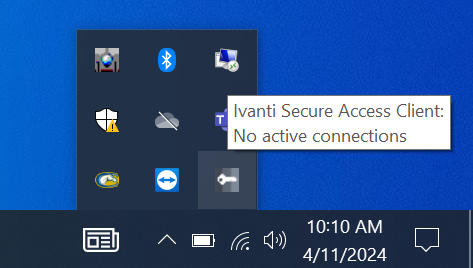
STEP 1
In your task tray, find the Ivanti Secure Access icon, click on it, hover over FOA VPN, and then click Connect.

STEP 2:
When connecting to the FOA VPN, you will be prompted for your email address (your email address should be remembered for future connections).
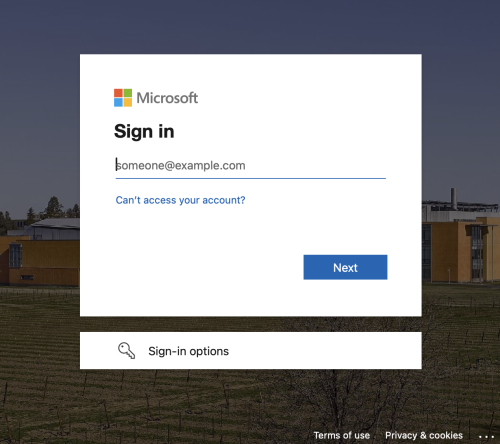
STEP 3:
At the UC Davis ADFS Sign in page, enter your information as follows.
User Name: your-email
Password: your-normal-computing-passphrase

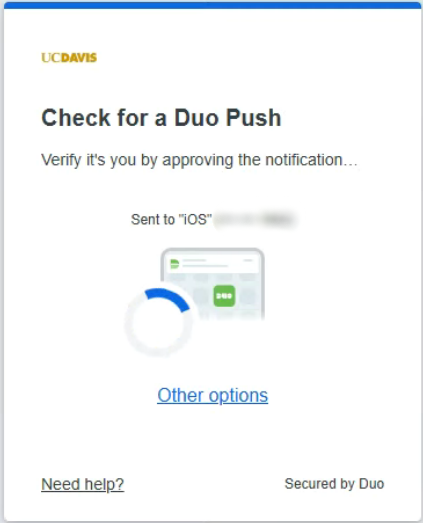
STEP 6:
Next is the DUO authentication portion:
If you have the DUO smartphone app registered as your DUO authentication device, accept the automatic push notification sent to your device.
If you have a DUO hardware token registered as your DUO authentication device, enter your DUO secondary password from that device.
Select Other Options for other available DUO authentication methods.
STEP 7
After the Duo push, you may choose "Yes, this is my device" and your connection details will be remembered for 14 days. Choosing this option should expedite future connections to the FOA VPN.

Once the connection is established, you will see the following:
