How to setup and connect to the Campus VPN
Applies to: Windows
The following steps are for Windows computers. Mac users may have a different experience but can use these steps for general guidance.
Sections
Setup Campus VPN in Ivanti Secure Access Client
- Open Ivanti Secure Access Client from your Start Menu.
Click the + button at add a connection.

In the New Connection window, enter in the following
Name: Campus VPN
Server URL: vpn.ucdavis.edu
- Click Add.
Connect to the Campus VPN
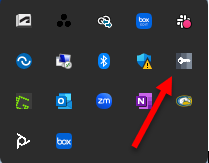
In your task tray, find the Ivanti Secure Access Client icon, click on it, hover over Campus VPN, and then click connect.
OR
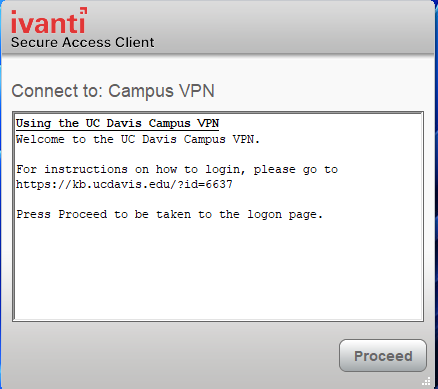
If Ivanti Secure Access Client is already open, click Connect on Campus VPNAt the next window, click Proceed.
On a Windows computer, the Campus VPN will automatically use whichever email account you are currently logged into on the computer. NOTE: If you are a student employee in FOA with a [email protected] account. Please contact [email protected] for assistance. Your [email protected] account will not let you connect to the VPN)
If you do see the Microsoft login page, enter your UC Davis email address.
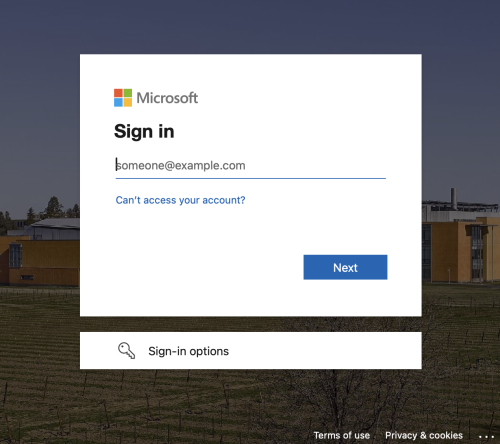
If prompted at the UC Davis ADFS login page, enter your UCD computing account credentials

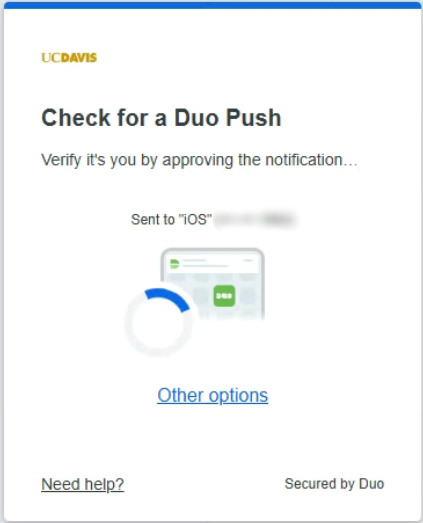
- Respond to the DUO push notification on your mobile device
- When prompted, answer the device-sharing questions:
- Yes, this is my device (You will be remembered for 14 days)
- No, other people use this device

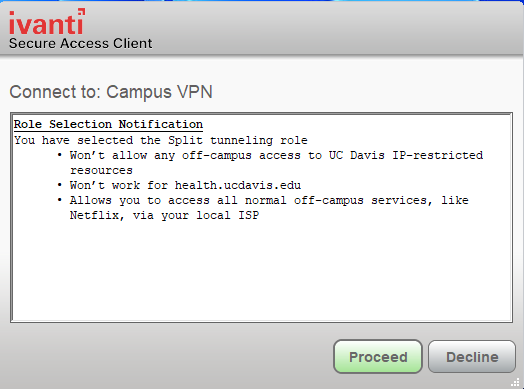
At the next window, select UCD-SPLIT-TUNNEL (Preferred) or UCD-FULL-TUNNEL (Less Common), then click Connect.
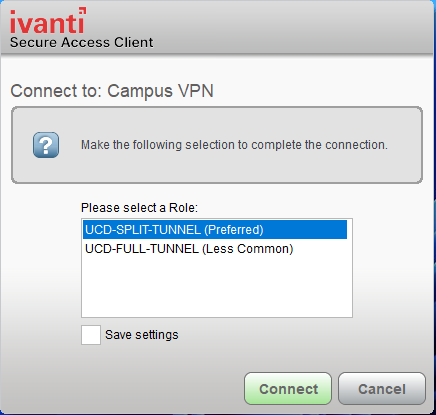
In general, you should choose UCD-SPLIT-TUNNEL (Preferred), unless:
• You need to access academic resources available through the UC Davis libraries
• You need to access health.ucdavis.edu while connected to the VPNAt the next window, click Proceed